PBR基础
读Abedo的Guidebook时,发现有一些以前没注意的细节,也在这里补一下笔记。
- Metal-Roughness工作流
- Pros
- 非金属统一使用0.04的F0,不容易出错
- 纹理内存使用量小(metal、roughness都只需要单通道)
- Cons
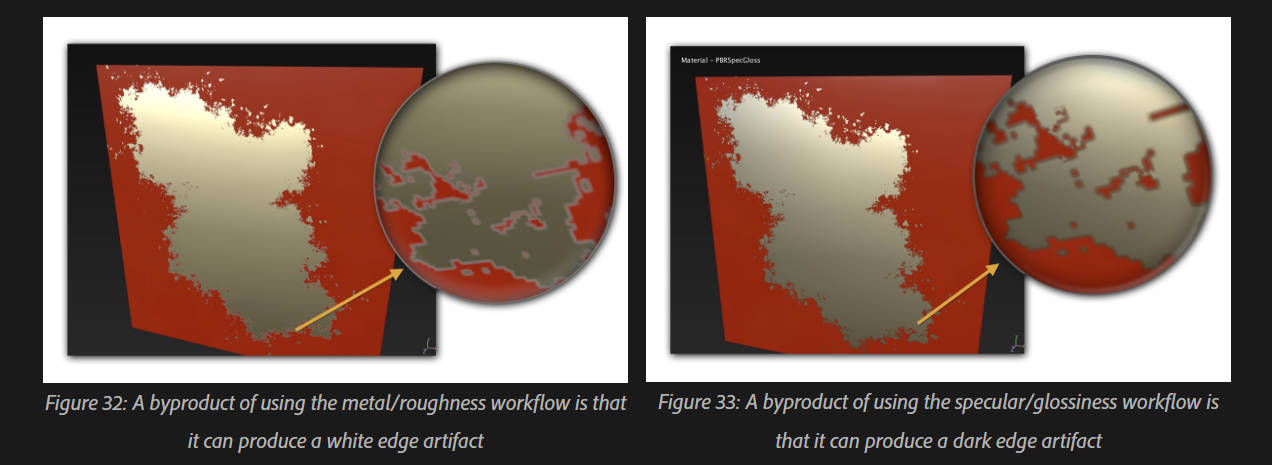
- 低分辨率下edge artifact更明显
- Specular-Glossiness工作流
- Specular可调配非金属F0,一般为2%~5%,即40 ~ 75 sRGB
- Glossiness可视为1-roughness
- Pros
- 可以设置非金属F0
- 低分辨率下edge artifact不明显
- Cons
- 容易出错使能量不守恒
- 纹理内存使用量大
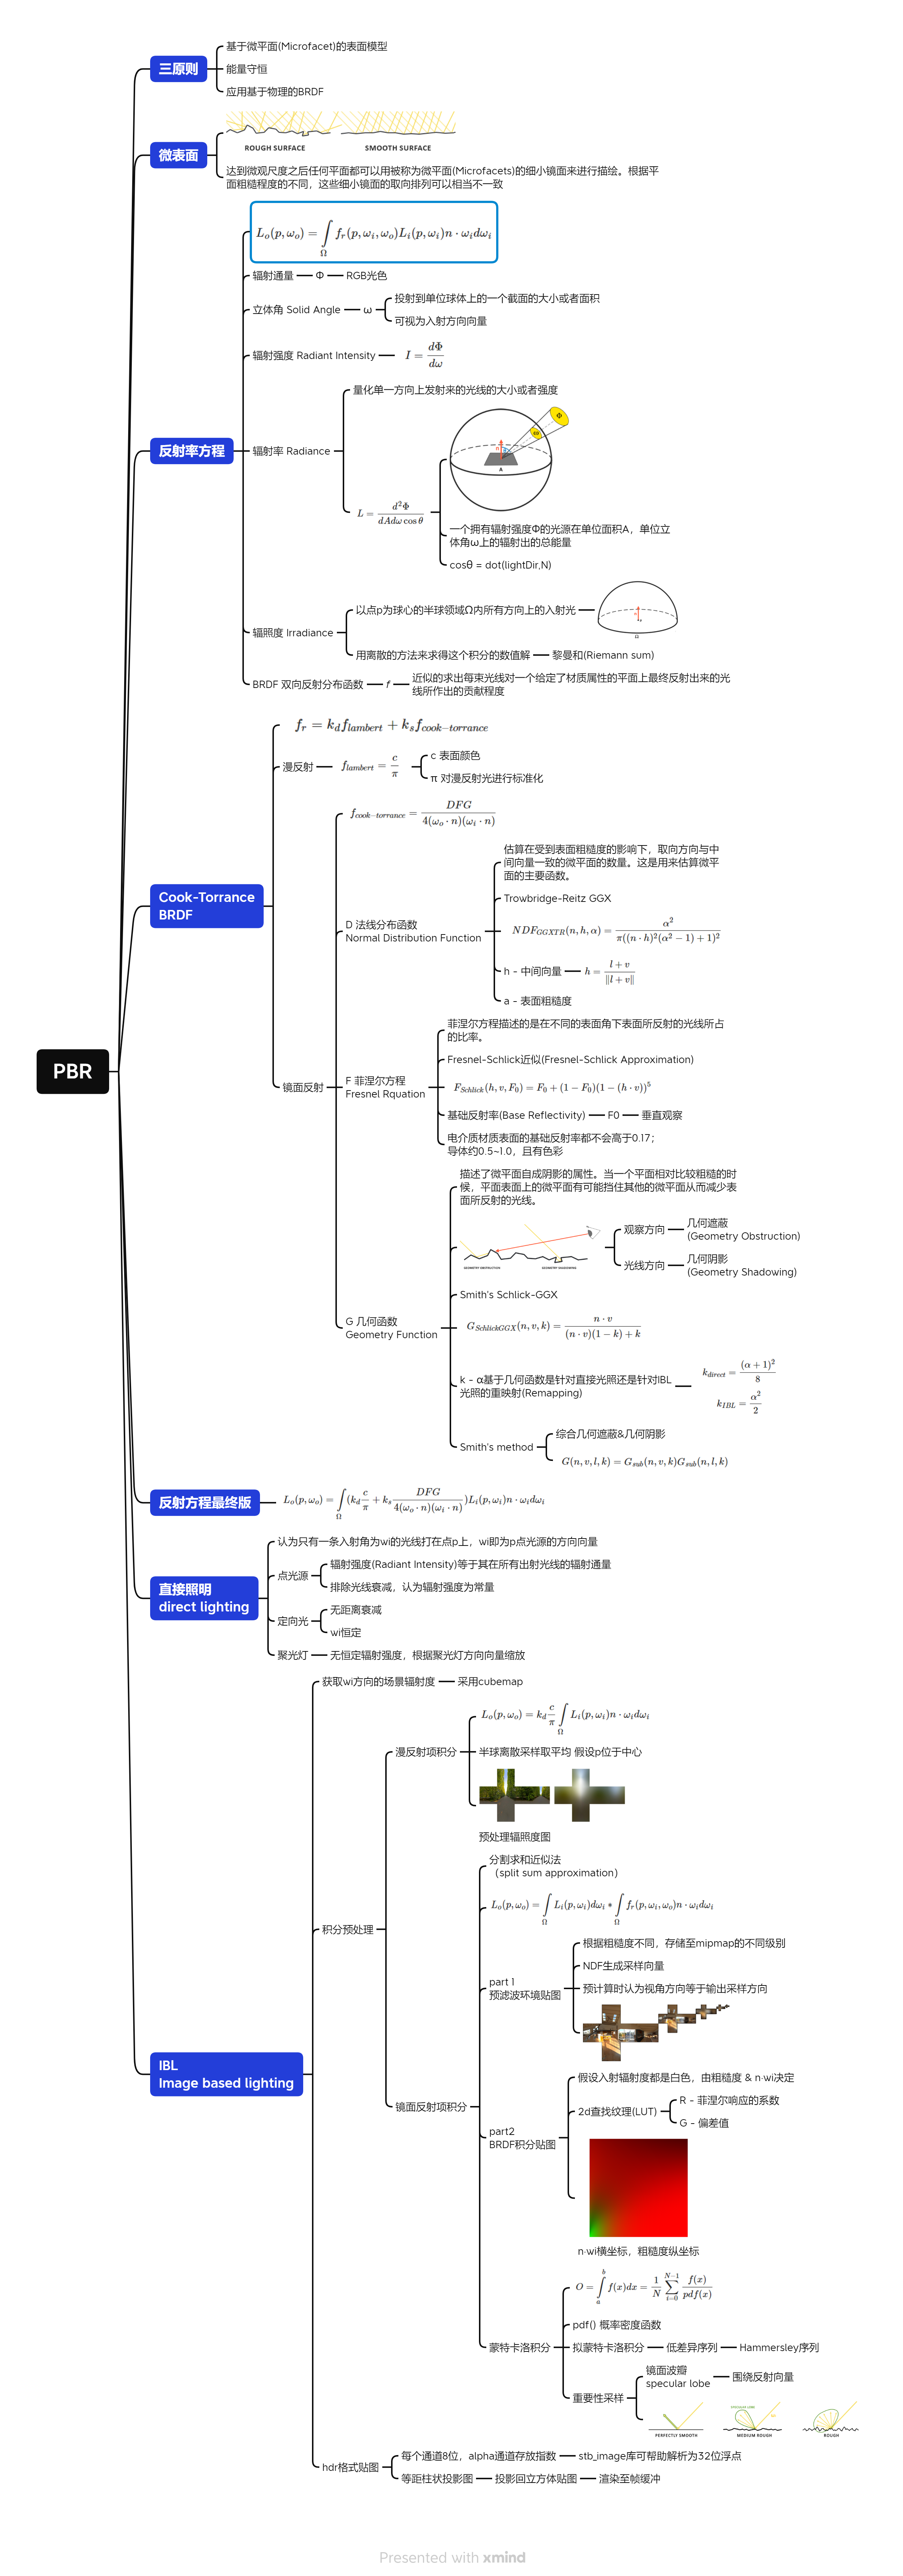
Reference: PBR-理论 LearnOpenGL CN PBR-直接光照 LearnOpenGL CN PBR-IBL LearnOpenGL CN The PBR Guide - Part 1 AbedoSubstance The PBR Guide - Part 2 AbedoSubatance
直接光照Shader
其中的DFG函数可表示如下:
// ----------------------------------------------------------------------------
float DistributionGGX(vec3 N, vec3 H, float roughness)
{
    float a = roughness*roughness;
    float a2 = a*a;
    float NdotH = max(dot(N, H), 0.0);
    float NdotH2 = NdotH*NdotH;

    float nom   = a2;
    float denom = (NdotH2 * (a2 - 1.0) + 1.0);
    denom = PI * denom * denom;

    return nom / denom;
}
// ----------------------------------------------------------------------------
float GeometrySchlickGGX(float NdotV, float roughness)
{
    float r = (roughness + 1.0);
    float k = (r*r) / 8.0;

    float nom   = NdotV;
    float denom = NdotV * (1.0 - k) + k;

    return nom / denom;
}
// ----------------------------------------------------------------------------
float GeometrySmith(vec3 N, vec3 V, vec3 L, float roughness)
{
    float NdotV = max(dot(N, V), 0.0);
    float NdotL = max(dot(N, L), 0.0);
    float ggx2 = GeometrySchlickGGX(NdotV, roughness);
    float ggx1 = GeometrySchlickGGX(NdotL, roughness);

    return ggx1 * ggx2;
}
// ----------------------------------------------------------------------------
vec3 fresnelSchlick(float cosTheta, vec3 F0)
{
    return F0 + (1.0 - F0) * pow(clamp(1.0 - cosTheta, 0.0, 1.0), 5.0);
}
完整的片段着色器构成如下。案例场景中有四个点光源,对每一个点光源进行遍历后叠加环境光即可。
    vec3 N = getNormalFromMap();
    vec3 V = normalize(camPos - WorldPos);

    // calculate reflectance at normal incidence; if dia-electric (like plastic) use F0
    // of 0.04 and if it's a metal, use the albedo color as F0 (metallic workflow)
    vec3 F0 = vec3(0.04);
    F0 = mix(F0, albedo, metallic);

    // reflectance equation
    vec3 Lo = vec3(0.0);
    for(int i = 0; i < 4; ++i)
    {
        // calculate per-light radiance
        vec3 L = normalize(lightPositions[i] - WorldPos);
        vec3 H = normalize(V + L);
        float distance = length(lightPositions[i] - WorldPos);
        float attenuation = 1.0 / (distance * distance);
        vec3 radiance = lightColors[i] * attenuation;

        // Cook-Torrance BRDF
        float NDF = DistributionGGX(N, H, roughness);
        float G   = GeometrySmith(N, V, L, roughness);
        vec3 F    = fresnelSchlick(max(dot(H, V), 0.0), F0);

        vec3 numerator    = NDF * G * F;
        float denominator = 4.0 * max(dot(N, V), 0.0) * max(dot(N, L), 0.0) + 0.0001; // + 0.0001 to prevent divide by zero
        vec3 specular = numerator / denominator;

        // kS is equal to Fresnel
        vec3 kS = F;
        // for energy conservation, the diffuse and specular light can't
        // be above 1.0 (unless the surface emits light); to preserve this
        // relationship the diffuse component (kD) should equal 1.0 - kS.
        vec3 kD = vec3(1.0) - kS;
        // multiply kD by the inverse metalness such that only non-metals
        // have diffuse lighting, or a linear blend if partly metal (pure metals
        // have no diffuse light).
        kD *= 1.0 - metallic;

        // scale light by NdotL
        float NdotL = max(dot(N, L), 0.0);

        // add to outgoing radiance Lo
        Lo += (kD * albedo / PI + specular) * radiance * NdotL;  // note that we already multiplied the BRDF by the Fresnel (kS) so we won't multiply by kS again
    }

    // ambient lighting (note that the next IBL tutorial will replace
    // this ambient lighting with environment lighting).
    vec3 ambient = vec3(0.03) * albedo * ao;

    vec3 color = ambient + Lo;

    // HDR tonemapping
    color = color / (color + vec3(1.0));
    // gamma correct
    color = pow(color, vec3(1.0/2.2));
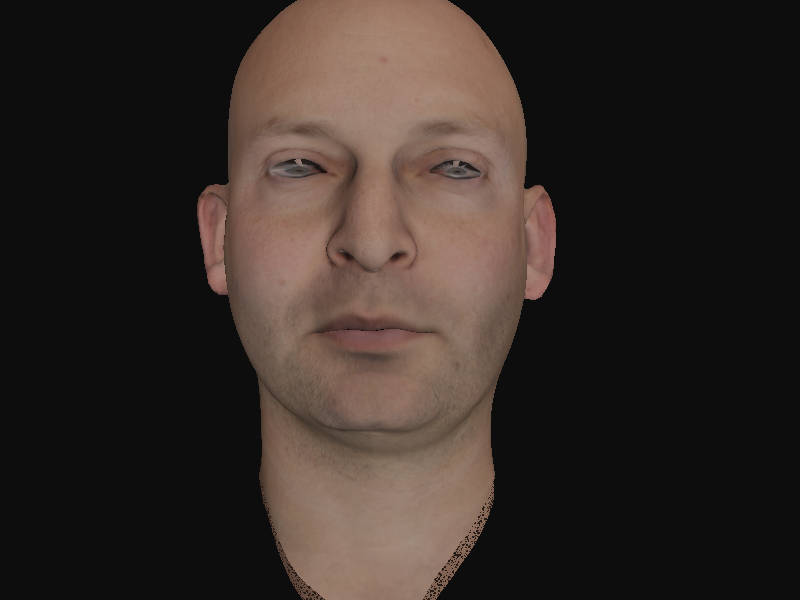
作业素材提供了一张灰度值的"specular"贴图,我们就当作glossiness来用了,渲染获得的头部模型如下:
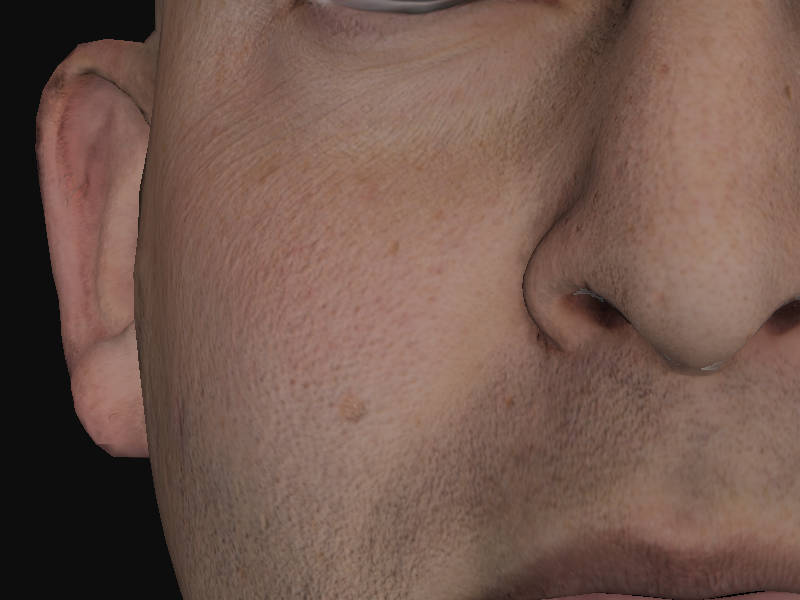
 看看毫无投射的面部毛孔——
 下一节我们从前向渲染换延迟渲染,然后准备算曲率!

